Windows 11 setup guide.
If you cannot authenticate, your device may be set to use machine authentication instead of user authentication. Use the guide below to manually add the WiFi network.
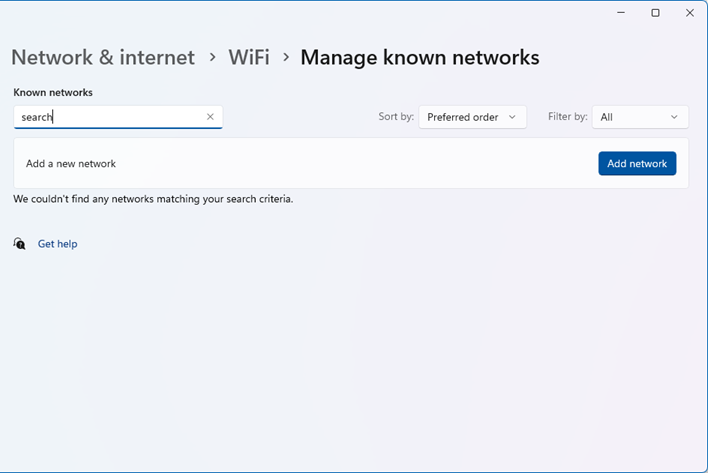
Open device settings — you can search for this by pressing the Windows key on your keyboard.

Click "Manage Known Networks" then click "Add Network".
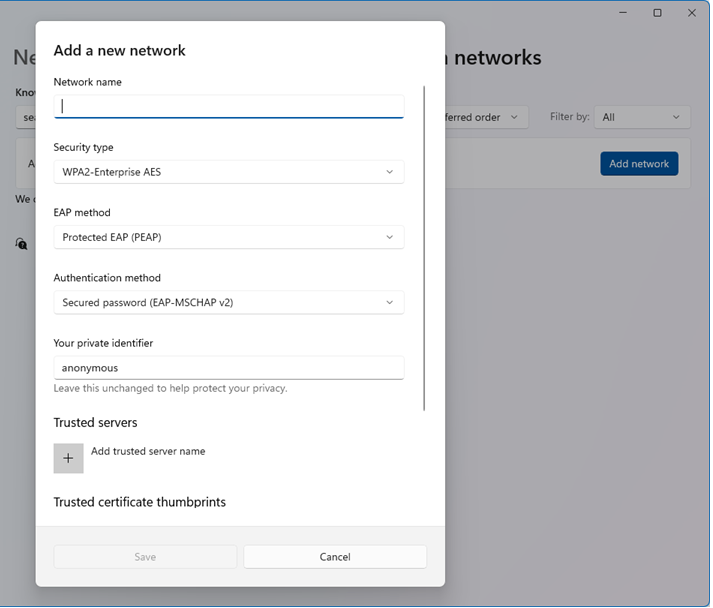
Add the network SSID found in your email. This must be exact and is case sensitive. Fill in the rest of the details as shown.
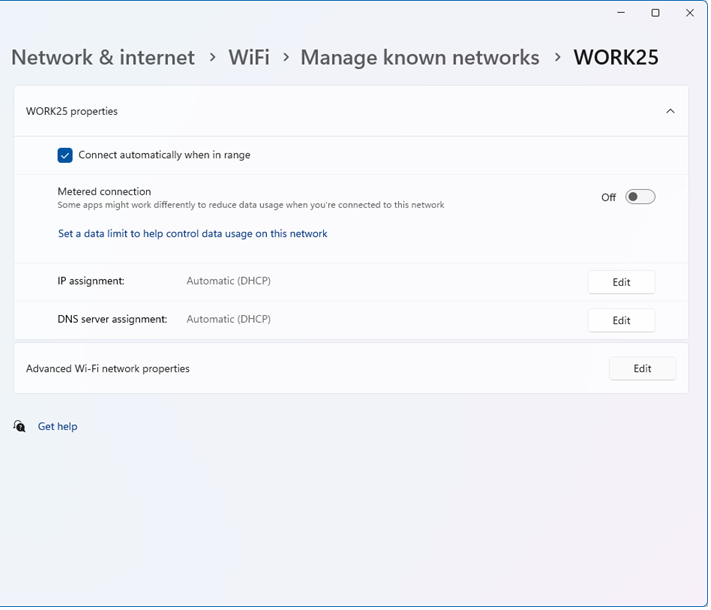
Select the network you just added from the list and click the "Edit" button next to "Advanced WiFi Network properties".
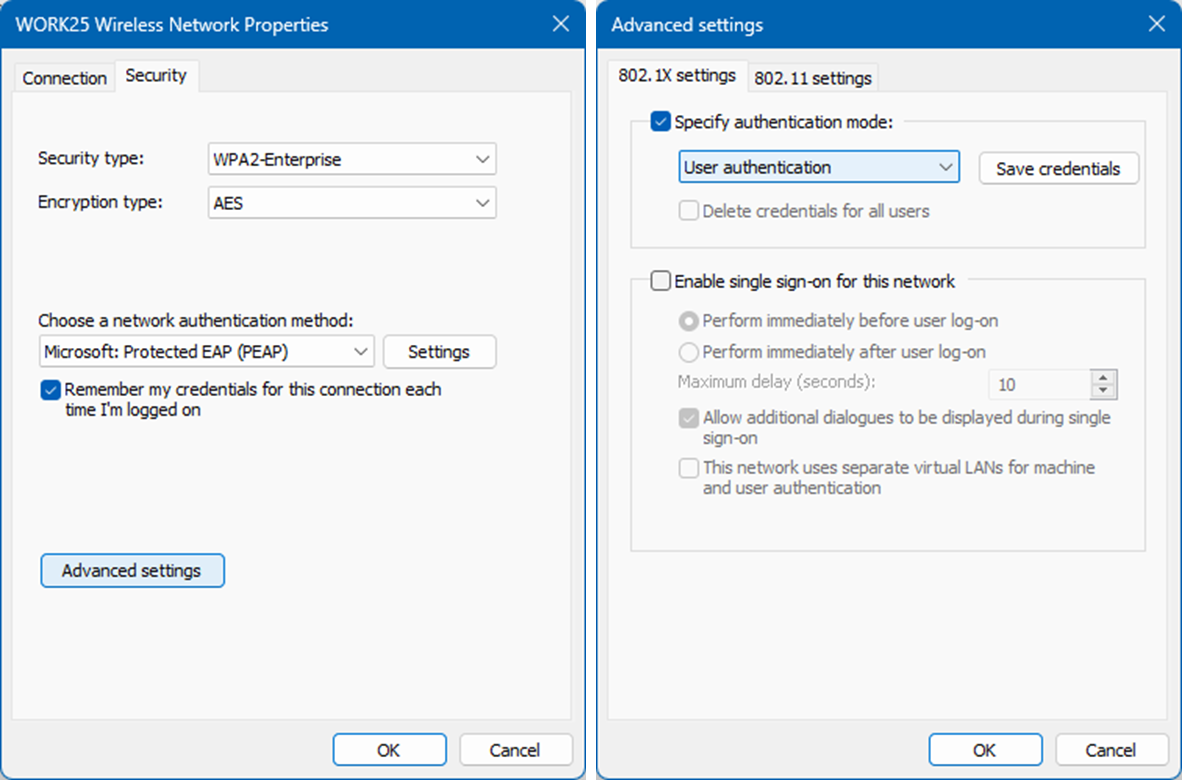
Populate the details shown and click "Advanced Settings". Set the 802.1X authentication mode to "User authentication". Click OK — you should now be able to select and connect to the network.
Network Certificates
We recommend downloading our root certificate and associating it with the network connection to make sure you only connect to a valid network. You can download the certificate file here.
Android 10 and above will ask for the domain when connecting. The domain is Easy WiFi AAA (case sensitive).